Filters can add and enhance certain effects in photography that cannot be achieved in post processing. The travel (and landscape) photographer need these 2 filters: the CPL and the ND filter. I start with the CPL filter. The ND filter comes in a separate article.
CPL Filter
What means CPL ? CPL Stands for Circular Polarising Lens. And what does it do ? Well a lot, given certain conditions. 😊 Using a CPL is like giving your lens/sensor sunglasses. That’s it in short. So now a bit longer explanation.
The function of CPL Filter is that it lets light waves of a specific polarization pass through while blocking light waves of other polarizations. You use a CPL Filter when you shoot reflective objects/landscapes in bright sunlight for example. These filters look like a black piece of glass. When you look through it and turn it you can see that ‘Polarising’ effect. A really good way to see how it works is to hold your CPL in front of your display and turn it. A CPL filter also cuts light (meaning: less light comes through the lens) so you need to compensate a bit if neccesary. Up the ISO or shutter speed a bit.

Using a CPL Filter
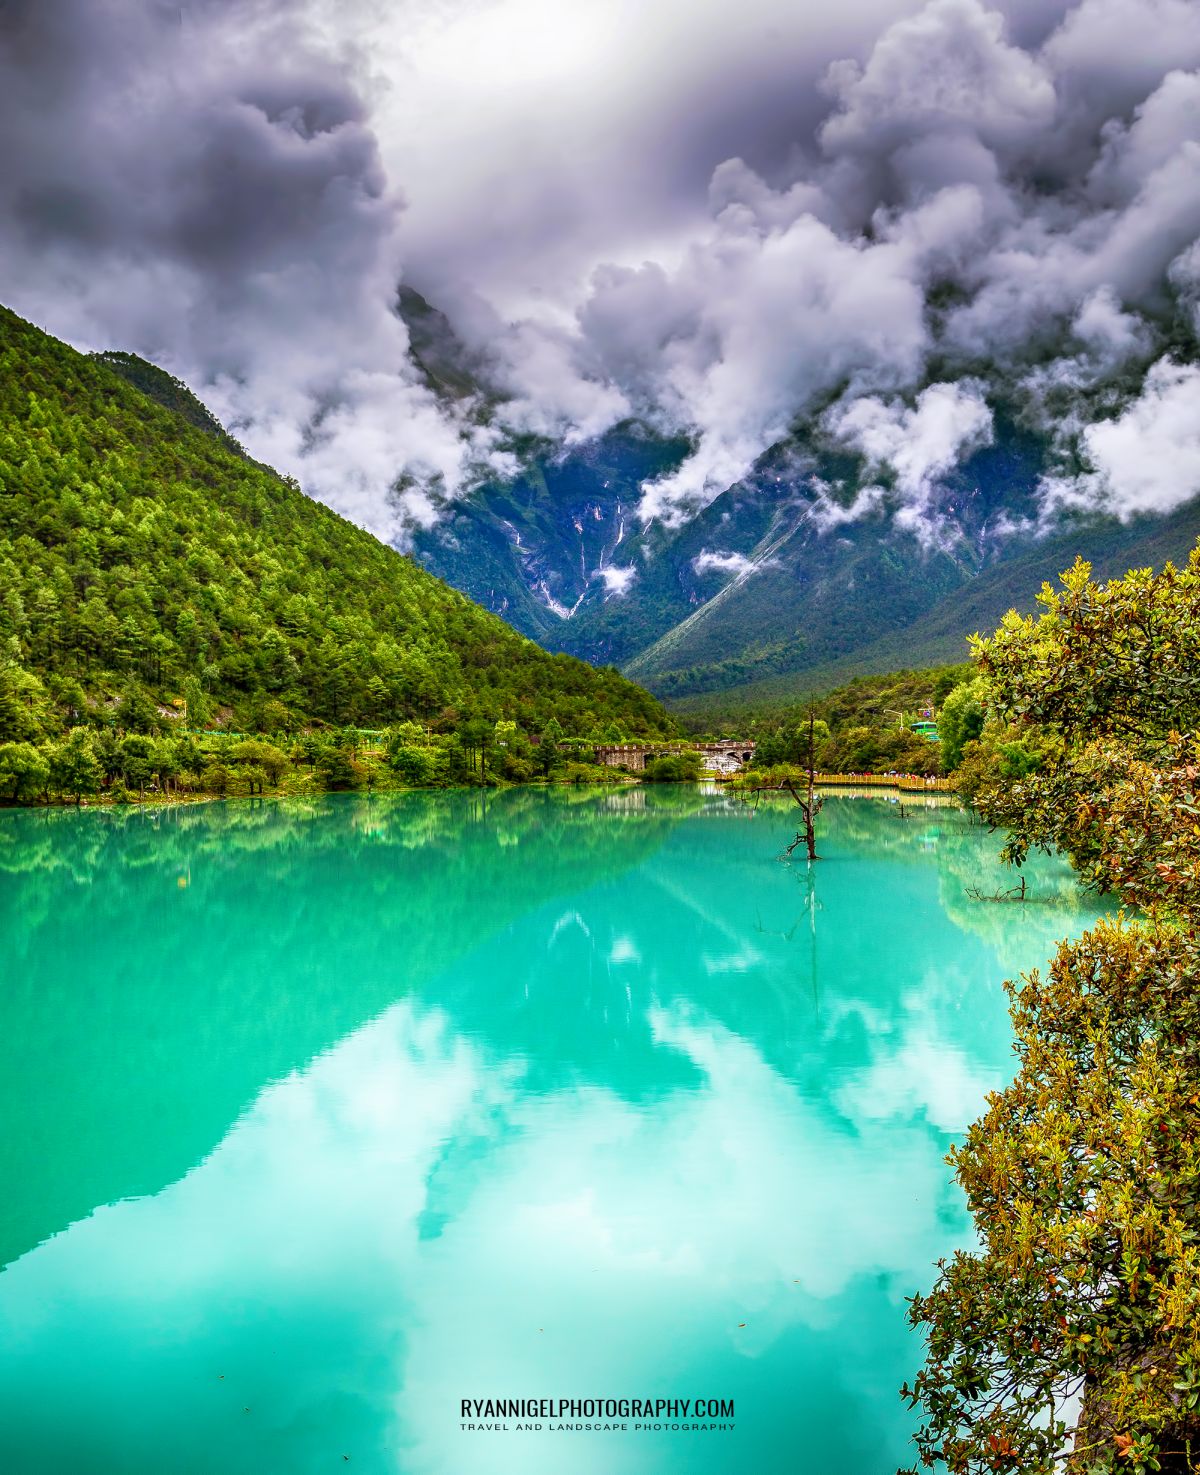
You need to learn how to use a CPL filter. You can turn the filter clockwise and counter clockwise. Why ? Well, as said before, when you want to take a photo with a CPL you have to turn the filter to see if you get the desired (Polarized) effect. Lets say you want to shoot a waterfall and the water is quite reflective. You can use a CPL to get that reflection out. Look on your screen or viewfinder. Turn the CPL and you can see the effect. Other example: you are on a boat and you want to shoot that turtle that passes by just under the surface. With a CPL on your lens you can ‘see through’ the water. When you turn the filter, you get that surface reflection out.
CPL filters can also work when you don’t shoot in direct bright sunlight. But in grey overcast weather it is nearly no use to use them. However, when you are in a situation, say shooting a scene with water, you can use the CPL to get that reflection out of the streaming water.
Another advantage of a CPL is that it naturally enhance color. So you sky is more blue, your grass is more green, your car is more red. Etc.
As said before you need to turn the glass on the filter to get the desired effect. But there is more. When shooting in straight blue skies you need to watch your position relative to the direction of the sunlight. When you don’t do that, your blue sky will be unevenly lit due to the effect of the polarizer. The maximum polarization effect takes place at an angle of 90 degrees from the sun that move in a circular band. This means that if the sun is at the top, you would get equally lit sky if you are shooting at an angle of 90 degrees from the sun. KEEP THIS IN MIND ! because an unevenly lit sky you cannot correct in post processing unless you do sky replacement.
Post Processing
Depending on which brand of filter you buy and use, you can get a color cast when using CPL filters. For a while i had a Canon 70D with a 10-18mm wide lens. I had a HOYA CPL on it and it gave me in 90% of the cases a yellowish color cast. In post i could correct this but it was something to pay attention to. I also had a Fujifilm X-T2 with a 16-50mm. With this one i use a B&W Smart CPL and i didn’t get any color cast at all. Later i found out that it is the wide angle that gives the color cast. In short: if you shoot wider that 24mm (in Full Frame) a CPL can give you a color cast due to the angle of the sun relative to the field of view of the lens. Not to mention the fall off of the lens and filter. More about this in another article about lenses and filters. This can be corrected in Lightroom (LR) and/or Photoshop (PS), but not completely.
When you do get a color cast you can easily correct this in post processing. In Lightroom (LR) you can change the Temp and/or Tint of the photo. If you use Photoshop (PS), you can use the color balance sliders to correct/compensate.
Examples when to use a CPL
Tropical seas. The blue sea, the turquoise sea, the green sea…. They look soooooo much better with a CPL ! Rivers, water flows, waterfalls. Unless you want to see that ‘Wet effect’ in the photo, use a CPL. Water is one of the most reflective surfaces that i know. White surfaces. When shooting white surfaces like domes or buildings in white, you can use a CPL to reduce the reflective effect of the color white. Buildings with reflective glass surfaces. Beach scenery. Well as said before with the tropical seas, beach scenery looks way better when shot with a CPL. But watch the sky ! Make sure it is evenly lit !
Prices
CPL’s come in various prices. And they come from cheap to verrrrrrryyyy expensive ! The thing is: which one do you need ? It also depends on your lens size, or better, the diameter of the front of your lens. Normally the diameter (or filter diameter) is always marked on the front of the lens. You got: 49mm, 52mm, 58mm, 62mm, 67mm, 77mm, 82mm, etc. The bigger the lens diameter the more expensive the filter. Prices depend on the glass coatings, materials, size and brand. When you buy a CPL you can first read some tests on internet. The tests are quite ok to get an insight in the price/quality. Top brands are: Lee Filters, B&W, Kasemann, Hoya. Of course there are more and every photographer has it own favourites. To me, B&W and K&F does do the job for me.
Final
There you have it ! An introduction to CPL filters. Get one and try it ! I hope this article was useful for you and that it will improve your photos. Remember the basics: rotate the filter to get the desired result and watch you angle relative to the sun. (watch those blue skies !). Happy shooting !