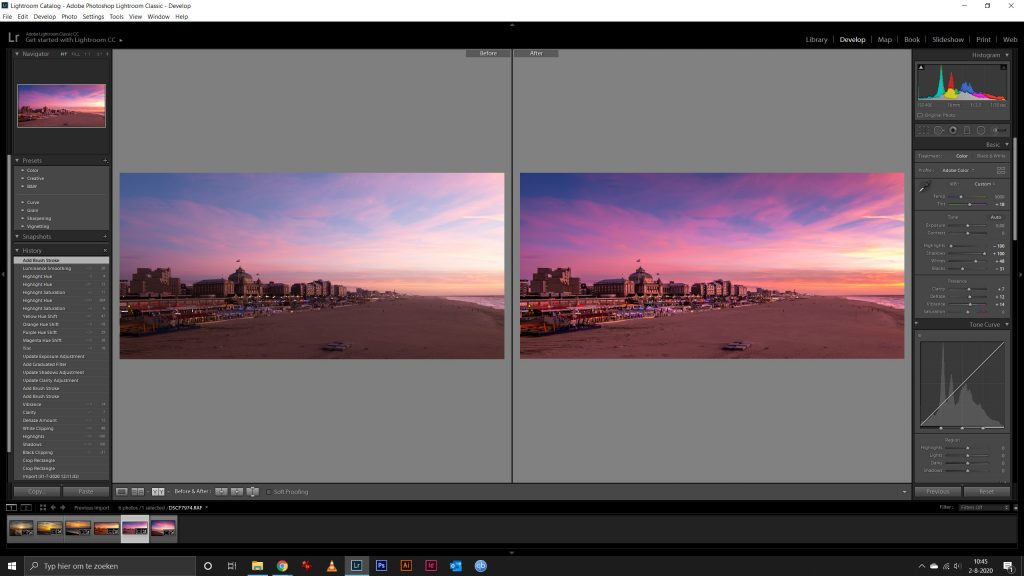
I think it is a must to post process your photos. In my previous post i talk about how I process my photos. In this post i talk about post processing in general.
But what is post processing actually ? Post processing is editing your photos in a photo editing program. Editing can be: color corrections, contrast and brightness corrections, exposure corrections, cropping, cut outs, etc. But also enhancing your photos. Like boosting color, recovering shadows, detailing, straighten horizons, adjusting aspect ratio, correction of tilt and shift, etc. Now, why do i think post processing is a must ? Well, through a camera we can ‘see’ only so much. And since we are capturing the scene digitally there is so much data available also on what we ‘don’t see’.
With post processing you can get more out of your photo by manipulating that data. And that is actually what post processing is. So the more data available, the more flexible the files are, the more you can get out of your photo. Shoot RAW and not JPG. RAW photos collect much more ‘data’ from the scene and when shooting uncompressed that ‘data’ can be highly manipulated. JPG is a compressed data collection and doesn’t have the flexibility as a RAW file. On the other hand, RAW files are huge, they can be over 100mb per photo while a same JPG photo can be 10mb.
Get a Good Monitor
What i think is very important is a good monitor or a laptop with a good screen. Why ? Well when see your photo on a cheapo windows laptop, the color is gone, the brightness, contrasts etc. all not what it should be. Same with cheap monitors. When you get a monitor you should check if the monitor can display 100% sRGB and at least 80% Adobe RGB. If you don’t know what this all means, no worries, just leave it like that and trust me on it 🙂 I will write a separate article about color. On cheap monitors your white is more like yellow or it has a yellow color cast (or blue, blue/green depending on the brand). Blacks are more deep dark grey and blues are…. well…. green blue ???
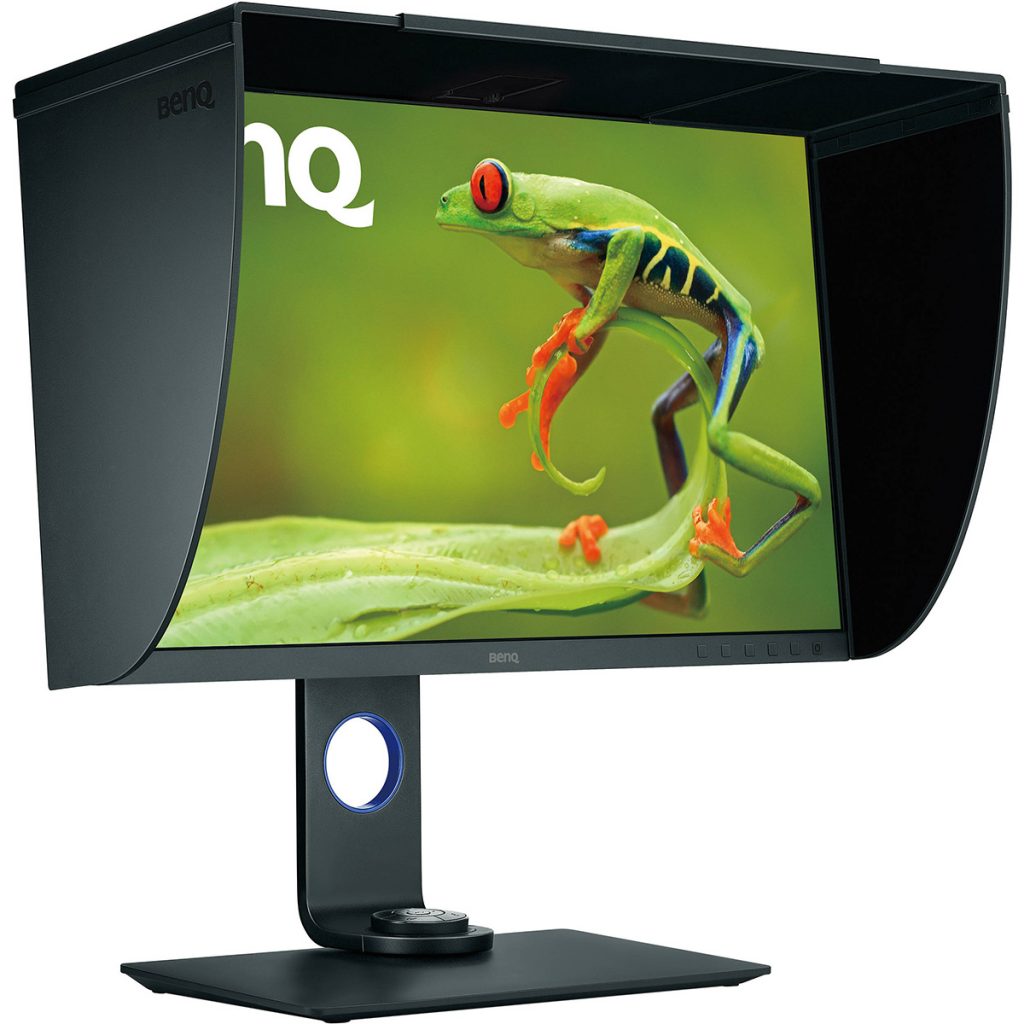
10-bit IPS panel with 14-bit 3D LUT Hardware Calibration. About a 1000,- euros but all worth it.
When doing color corrections it is important to see the color as it should be. Also when you have edited your photo, your photo looks nearly the same on a Apple and a Windows computer with a good screen. When you work at home on a laptop it is useful to get an external 27″ color corrected monitor. First, you have a way bigger screen so you can see what you do, second you can view 100% size and third: your photos will pop so much more !
I use a BenQ Photovue 27″ 4K. Costs about 1000 Euros but is all worth it. The 2.5K version goes for 6 to 700 euro so it doesn’t break your bank. There are 32″ available but i think its to big relative to the viewing distance. Also the 32″ are way more expensive and you don’t get any extras, just a bigger screen.
Straight Horizons and Perspectives
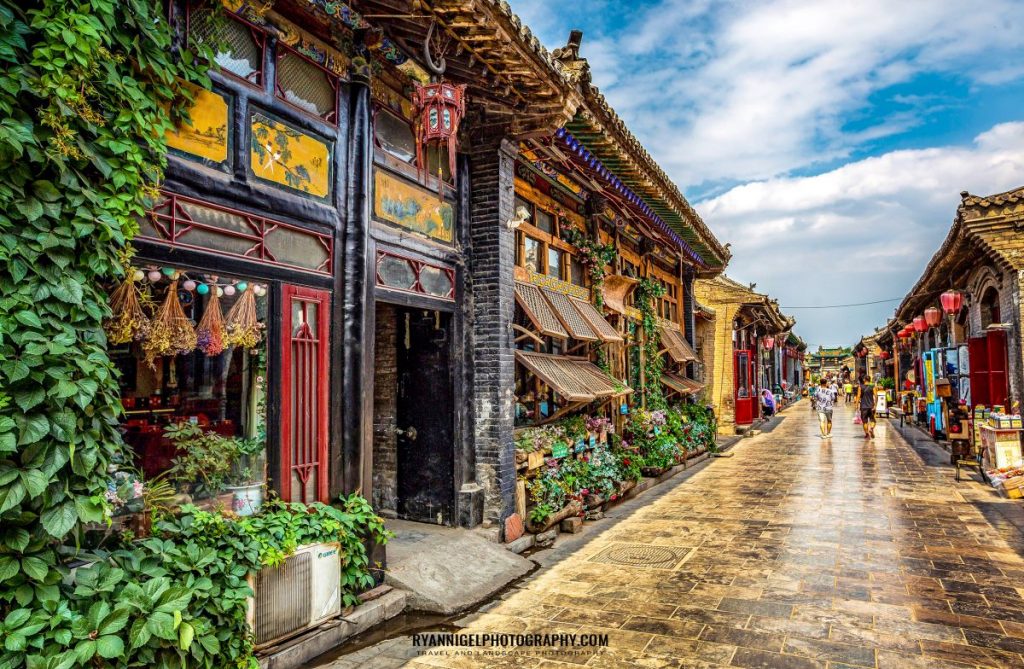
Most beginner photographers don’t know where to start. First of all look at your photo. Just look at it. And look at the horizon. Many many photographers don’t straighten the horizons. And a photo looks so much better when done this ! Really ! Second is balance. Balance is more like how you have composed the photo. The rule of 3rds is a good guide line to learn about composure.
The good thing from post processing is that you can fuck up your composition (to a certain level) and still get a good shot out of it, thanks to the cropping tools. Third are perspectives. What is perspective ? Actually it means seeing 3 dimensional things on a 2 dimensional surface. Your screen is 2 dimensional but the stuff you shoot is 3 dimensional. Getting a good perspective is also making good compositions. For example in Landscape photography: you can ‘see’ virtual lines in the landscape and horizon. Combined with an high F number (aperture value, like F10 to F16) you ‘create’ depth, and therefore a 3D perspective, in your photo.
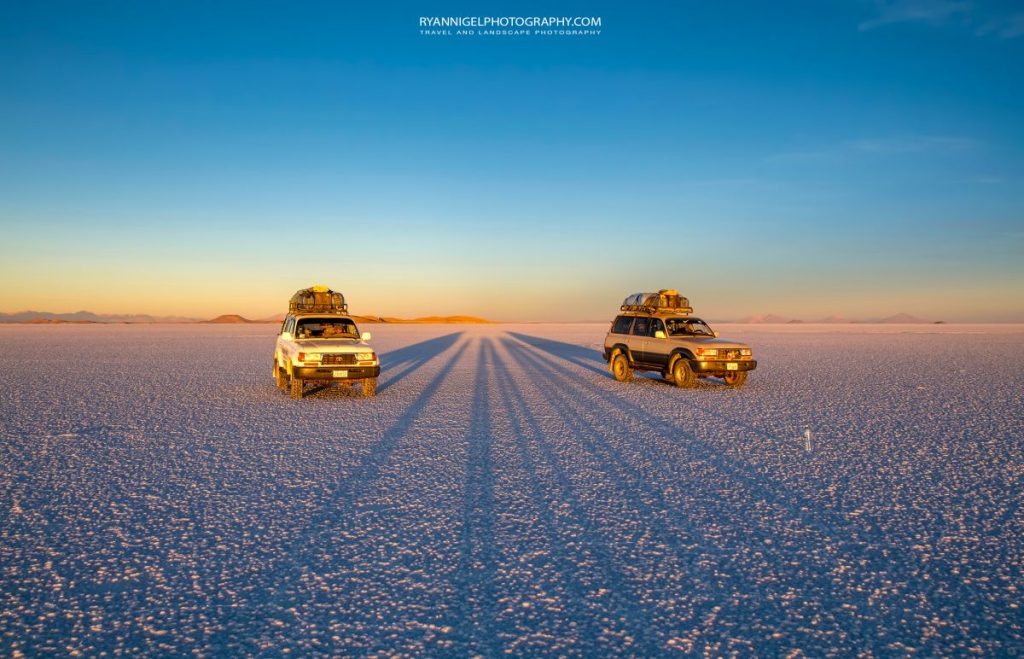
But there is more: most photographers (including me) shoot mostly on eye level. But try to shoot at ground level or from a higher point of view. You will see that the scene changes and you see that you can create depth from a different point of view.
To cut it short: a good photo is: balanced composition and exposure. Good photos are not made by very expensive cameras and lenses. Good photos are made by good photographers.
Noise
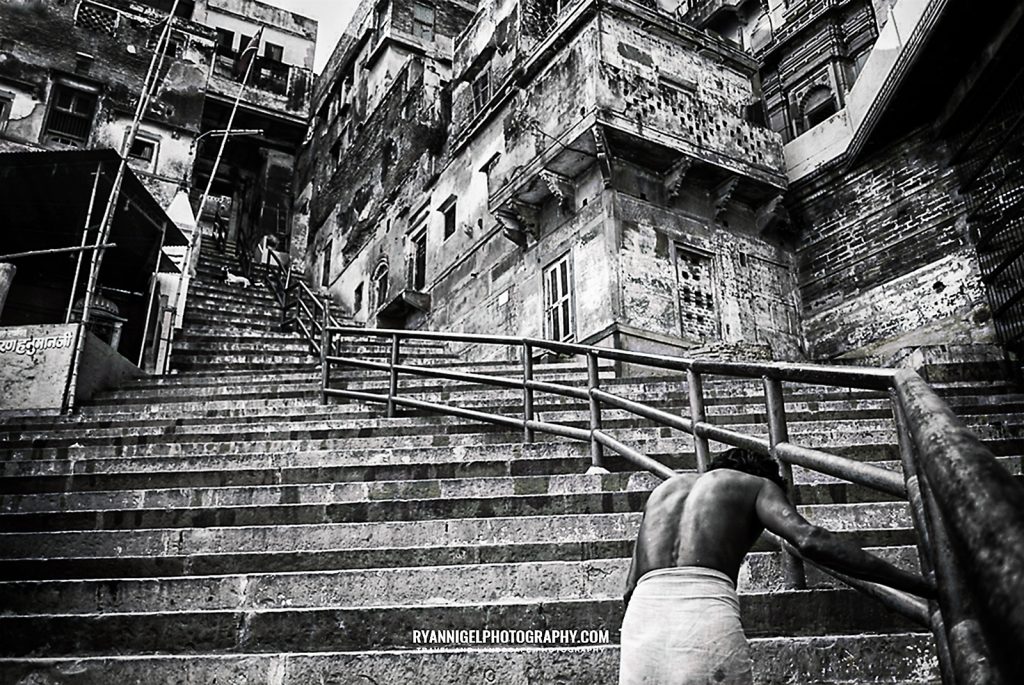
Most photographers hate noise. What is noise actually ? When you shoot a photo at high ISO like ISO 6400, your photo starts to look grainy. That ‘grainy’ look or actually that ‘grain’ we call noise. Now, there are many software programs to get rid of it and on YouTube you can find tons of videos how to do and with which program. But do you need to get rid of noise all the time ? I don’t think so. Especially in street photography, black and white street photography, noise can actually add mood to the scene.
The Olympus PEN F camera have a setting where you can add noise to the photo ! Also on Fujifilm cameras there is a possibility to use one of the ‘Film simulation’ modes combined with a high ISO. Depending on how creative you want to be with your photo editing, noise can add really some extras to the look of a photo. Noise can be nice but noise can also be terrible. And noise doesn’t need to appear only at high ISO. Also at low ISO noise can be visible. Especially when you ‘push’ or ‘edit’ the photo. There is many software available to get rid of all that noise. Myself, i use Topaz Labs Denoise as a plugin in Photoshop.
Noise is combined with high ISO. When shooting high ISO with a a mid tier camera the chances are great that you also get some loss of detail. And the higher the ISO the more the loss of detail and the more noise is visible. Most high end cameras like the new Canon R5 and R6, the Nikon Z6 and Z7 and Pentax K1 can shoot at high ISO with minimal loss of detail and not too much noise.
But most of us, most beginner photographers, don’t have cameras like these. These are 3 to 4,000+ USD camera bodies. They probably have a Sony A6300 or a Canon 80D or a Nikon 7200 or comparable. And those cameras produce a bit more noise than their high end brothers. When post processing the files from these mid tier cameras you will get loss of detail when getting rid of noise. Also due to the lesser and smaller sensor you capture less detail.
Lightroom
Lightroom from Adobe is by far the most used photo editing program. It is not free and in fact i do find it quite expensive. But you get a lot, a whole lot. Using Lightroom does require some decent specs on your computer. Apple or Windows, doesn’t matter you need a good processor and lots of memory. In the first part i mentioned RAW Files. And the reason that you need a good processor and good memory is because you need to load those large RAW files into Lightroom. A well specced computer can do that in seconds but when you run on a bare minimum it can take a while. (think minutes, think making and drinking a cup of tea or coffee).
The things that you can do with Lightroom are so much, i am not going into detail. Really, the sky is the limit. In my previous post you see some screen videos of my processing in Lightroom. And that are only the basics. If you want to see some videos about advanced post processing in Lightroom look at Serge Ramelli’s YouTube channel. There you can see the power of Lightroom. For me, he is the reason that got me started with Lightroom and i like his way of post processing. If it is not your cup of tea, no worries, there are plenty of tutorials on YouTube. 🙂
And if you don’t use Lightroom ?
Like i said, there are plenty of alternatives. They come from ‘for free’ to a one time buy. I have used Darktable, and in fact, i did test it for them. Darktable is a good and free alternative for Lightroom, but in my opinion can’t match Lightroom. The good thing about Darktable is that it is open source software. You can download it from their website. Also there is plenty of support. Darktable offers you almost the same ‘development’ tools as Lightroom.
There are some differences and also when you ‘develop’ photos the results can be different than compared with Lightroom. But then again, Lightroom gives also other results compared with C-One. You can get these free 30 day trail periods and its worth it to try. You have full functionality in the free trail of Lightroom and C-One and you can see if it suits you.
Another alternative is, like i mentioned, C-One or Capture One. C-One is not free, you need to buy it. But it is so damn good ! I use Fuji X Cameras and it is like i get more out of my files then with Lightroom. To me, C-One and Lightroom are the best. You can get so much more out of your photos (files).
Other options are RAWTHERAPEE, ACDSee which is also a video editor, if you are on a Linux system you can use GIMP, Luminar which is the closest thing to Photoshop and there are plenty more. Like i said, try a few and see which one suits you best.
Photoshop
Good old Photoshop. Who doesn’t know it ?? And it’s good, its powerful. But, as with Lightroom, you need a powerful computer. Apple or Windows alike you need some processing power.
What you can do with Photoshop is unlimited. Really, once you know your way into the program you can do so much. And when you get into the plugins, the sky is the limit. Now i can go into detail what i/you can do with it, but i think it is better to look on Youtube to some tutorials of Anthony Morganti and Serge Ramelli. They are 2 Youtubers from which i learned a lot, also they have a step by step proces. Its easy learning with these guys !
But to give a bit of insight what i do with Photoshop. I do noise reduction, color corrections, detailing and the use of the NIK plugin. NIK is a software package developed by Google and later bought by DXO. It use to be for free, but now you have to pay for it. Like nearly everything 🙁 …. So Noise Reduction: for me important. I use the Topaz Plugin called Topaz Denoise. Here you can set levels of how much you want to reduce noise in the photo. Also you can make some custom color adjustments, it got presets for RAW and JPEG and many more settings. I think its better then the default noise reduction of Photoshop itself.
For detailing i use Easy Panel from Jim Mcintyre. Its still for free so get you hands on it ! It’s is really cool and the amount of detail you can get out of your photos is huge. Easy panel is actually a ‘shortcut’ for a couple of things that you need to do in Photoshop to get those details out. Easy panel bundels it all in just one click and the only thing after is that you have to set some values that cannot be standardized. I would suggest to try it because it is really something nice.
NIK Collection. Well i use it for HDR and Black and White. NIK Silver Efex Pro is very cool and good. Photoshop offers you the possibility to work in layers so you can blend various layers of black and white processing with each other. The HDR is not that good. For really good HDR i use Aurora, but when i already work in Photoshop and the photo just need a little boost i use the HDR from NIK collection. Also here you can work in layers so you can easily blend the images to create a stunning final result.
In my previous post you can see an editing screen video how i use Photoshop.
More Plugins. Of course there are plenty of plugins for Photoshop. Hey, the sky is the limit ! Just Google Photoshop Plugins and see the hunderds of results. Read and take your pick…. 🙂
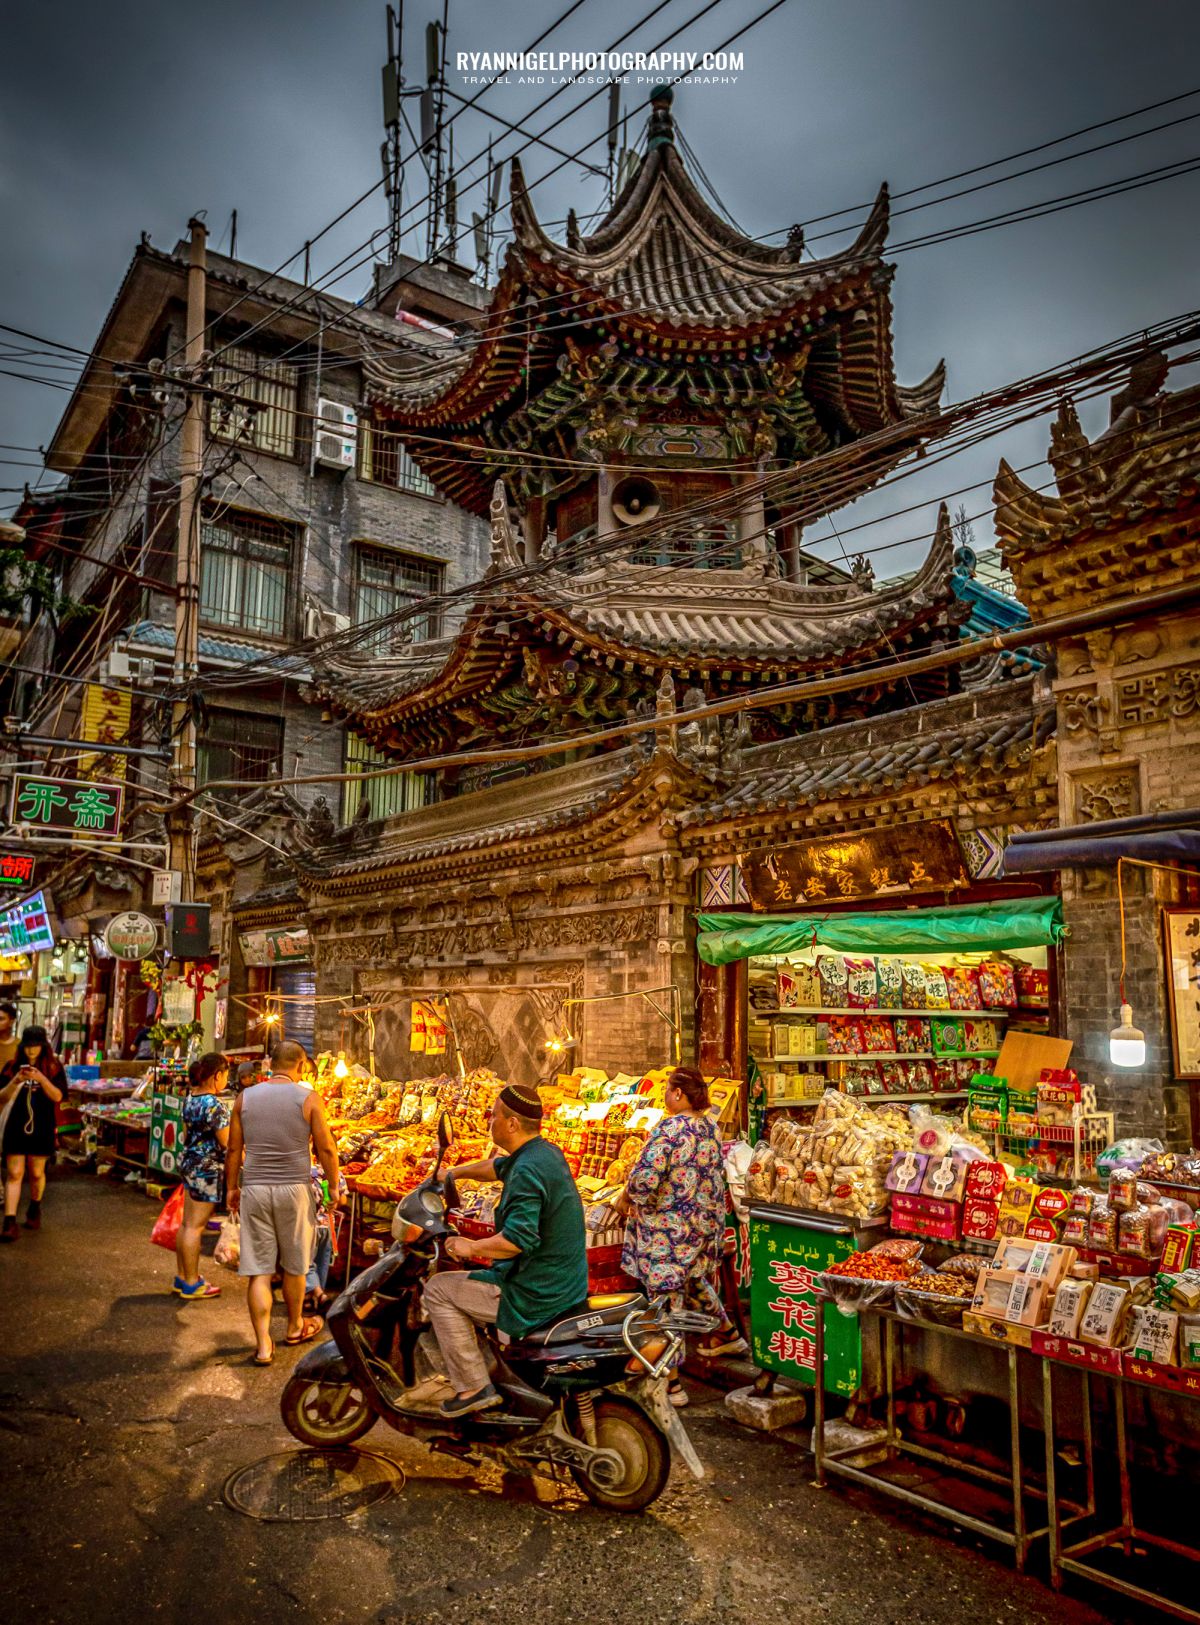
HDR (High Dynamic Range)
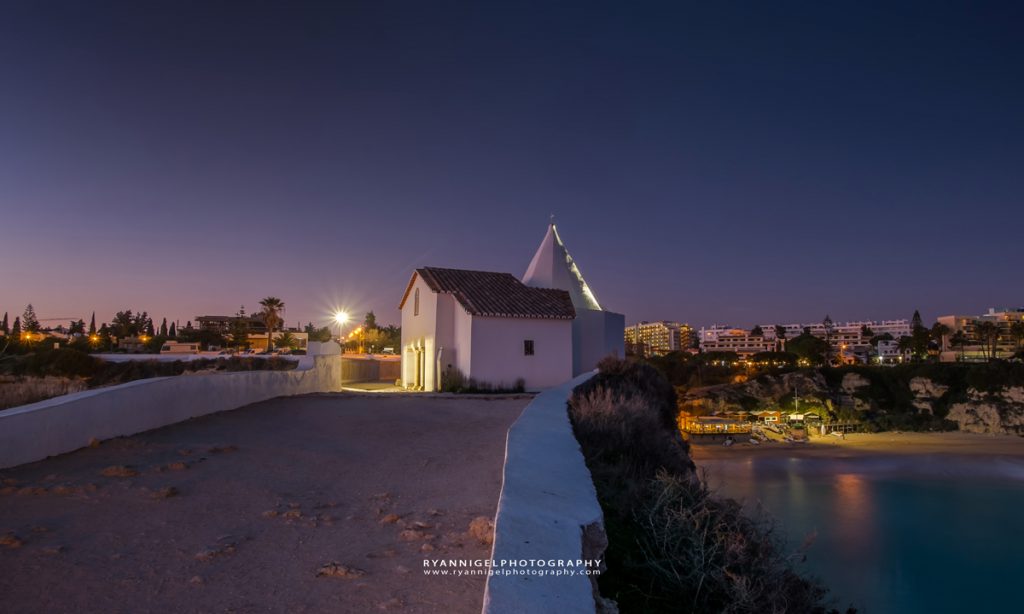
HDR stand for High Dynamic Range and is really a hype at the moment. A good HDR photo tones down the brightest parts and brightens up the darkest shadows. HDR balances the exposure. Normally it is done by taking 3 shots in 3 exposures. 1 Shot on normal exposure (0 EV), 1 shot on over exposure (+2 EV) and 1 shot on under exposure (-2 EV). With a program you can blend these 3 photos to 1 and create a HDR. Many modern cameras have a setting already build in.
Even phones can shoot HDR. But the results are not as good as when you use a dedicated program/software. Aurora, Photomatix and NIK HDR are programs/plugins to create HDR photos. The nice thing about working with plugins for Photoshop is that you can use the results as layers. So creativity gets a huge boost when you blend several HDR processes with each other. To me, Aurora is one of the very best HDR programs.
The best results you get when you merge 3 images in 3 exposure settings with each other. After that you can let your creativity run free with the presets or adjust the final image to your own taste. When using HDR, a camera body with a very good DR (dynamic range) produce better results. Also shoot in RAW format not in JPEG. RAW has more data available to process the HDR photo and therefore creates better results.
Detailing
This is something i LOVE to do 🙂 Really… Detailing is like bringing out the details that you normally would not see. The sensor, Full Frame or APS-C or M4/3, captures information. And many of that information is not visible on screen. But detailing programs and plugins like Jim Mcintyre’s Easy Panel bring it all out.
The stuff that it brings out in your photos is insane. Leaf details, rock details, etc. Especially for landscape photographers this is something to get your hands on. The ‘Enhance Details’ section in the Easy Panel is actually a series of Photoshop functions. It’s recorded in some kind of macro and when you run it, it does it nearly all for you. I use this tool a lot and as a plugin in Photoshop. I can create layers and blend them to create the final result.
Final
Of course there is plenty more post processing. This is just an introduction of what you can do with a photo and with the main or most popular post processing tools. Also it depends on your creativity and what you want to do with the photo. Don’t let other people scare you. Their opinion is not yours.
The most important thing is is that you are satisfied with the end result. That is all that matters. Some people like to go totally out of their minds with their new tools, let them ! And you should do too ! Why ? Its all part of the learning curve. Also once you see what you can do with it, you will broaden your horizon. Give a little more diversity to your portfolio too. So don’t be scared of post processing, editing your photos or go total creative. Just embrace those digital tools and see if it is something for you.