If you are a landscape photographer you should get into Graduated ND filters. These filters are very popular amongst landscape photographers to create a good balance between the sky and the foreground. We all have experienced the problem when making a photo of a light sky and a dark forground. Either the sky is overexposed and the foreground is ok, or the forground is too dark and the sky is ok. GND filters come in very handy here. Graduated ND filters come in various sizes and shapes, from screw-on filters to square stacked filters with special holders.
Square GND filters with holder and stepdown rings.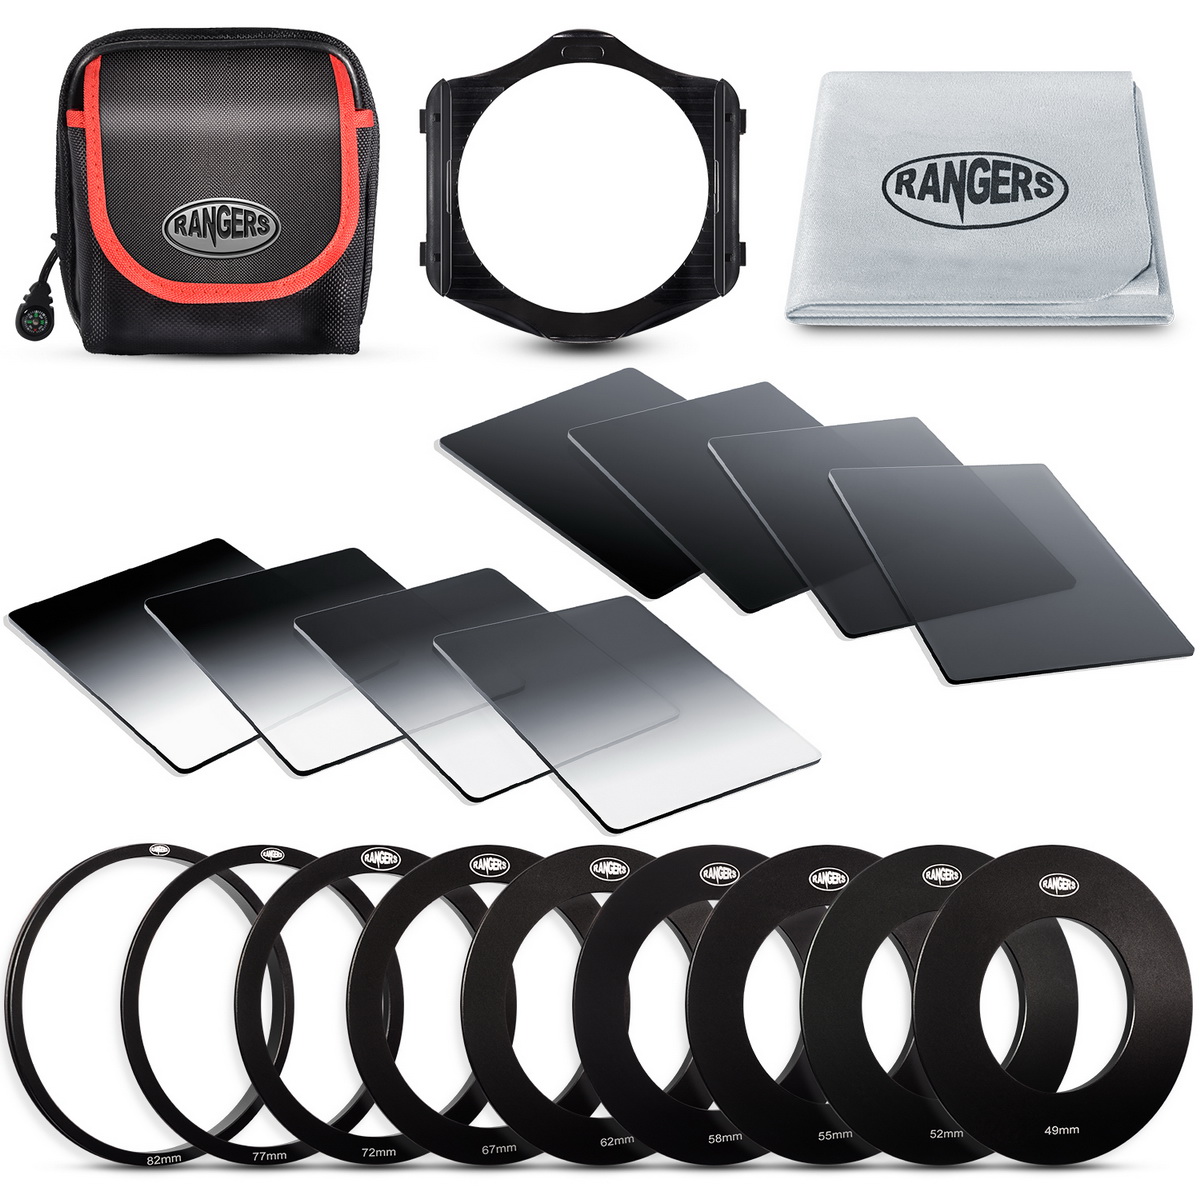
What is it ?
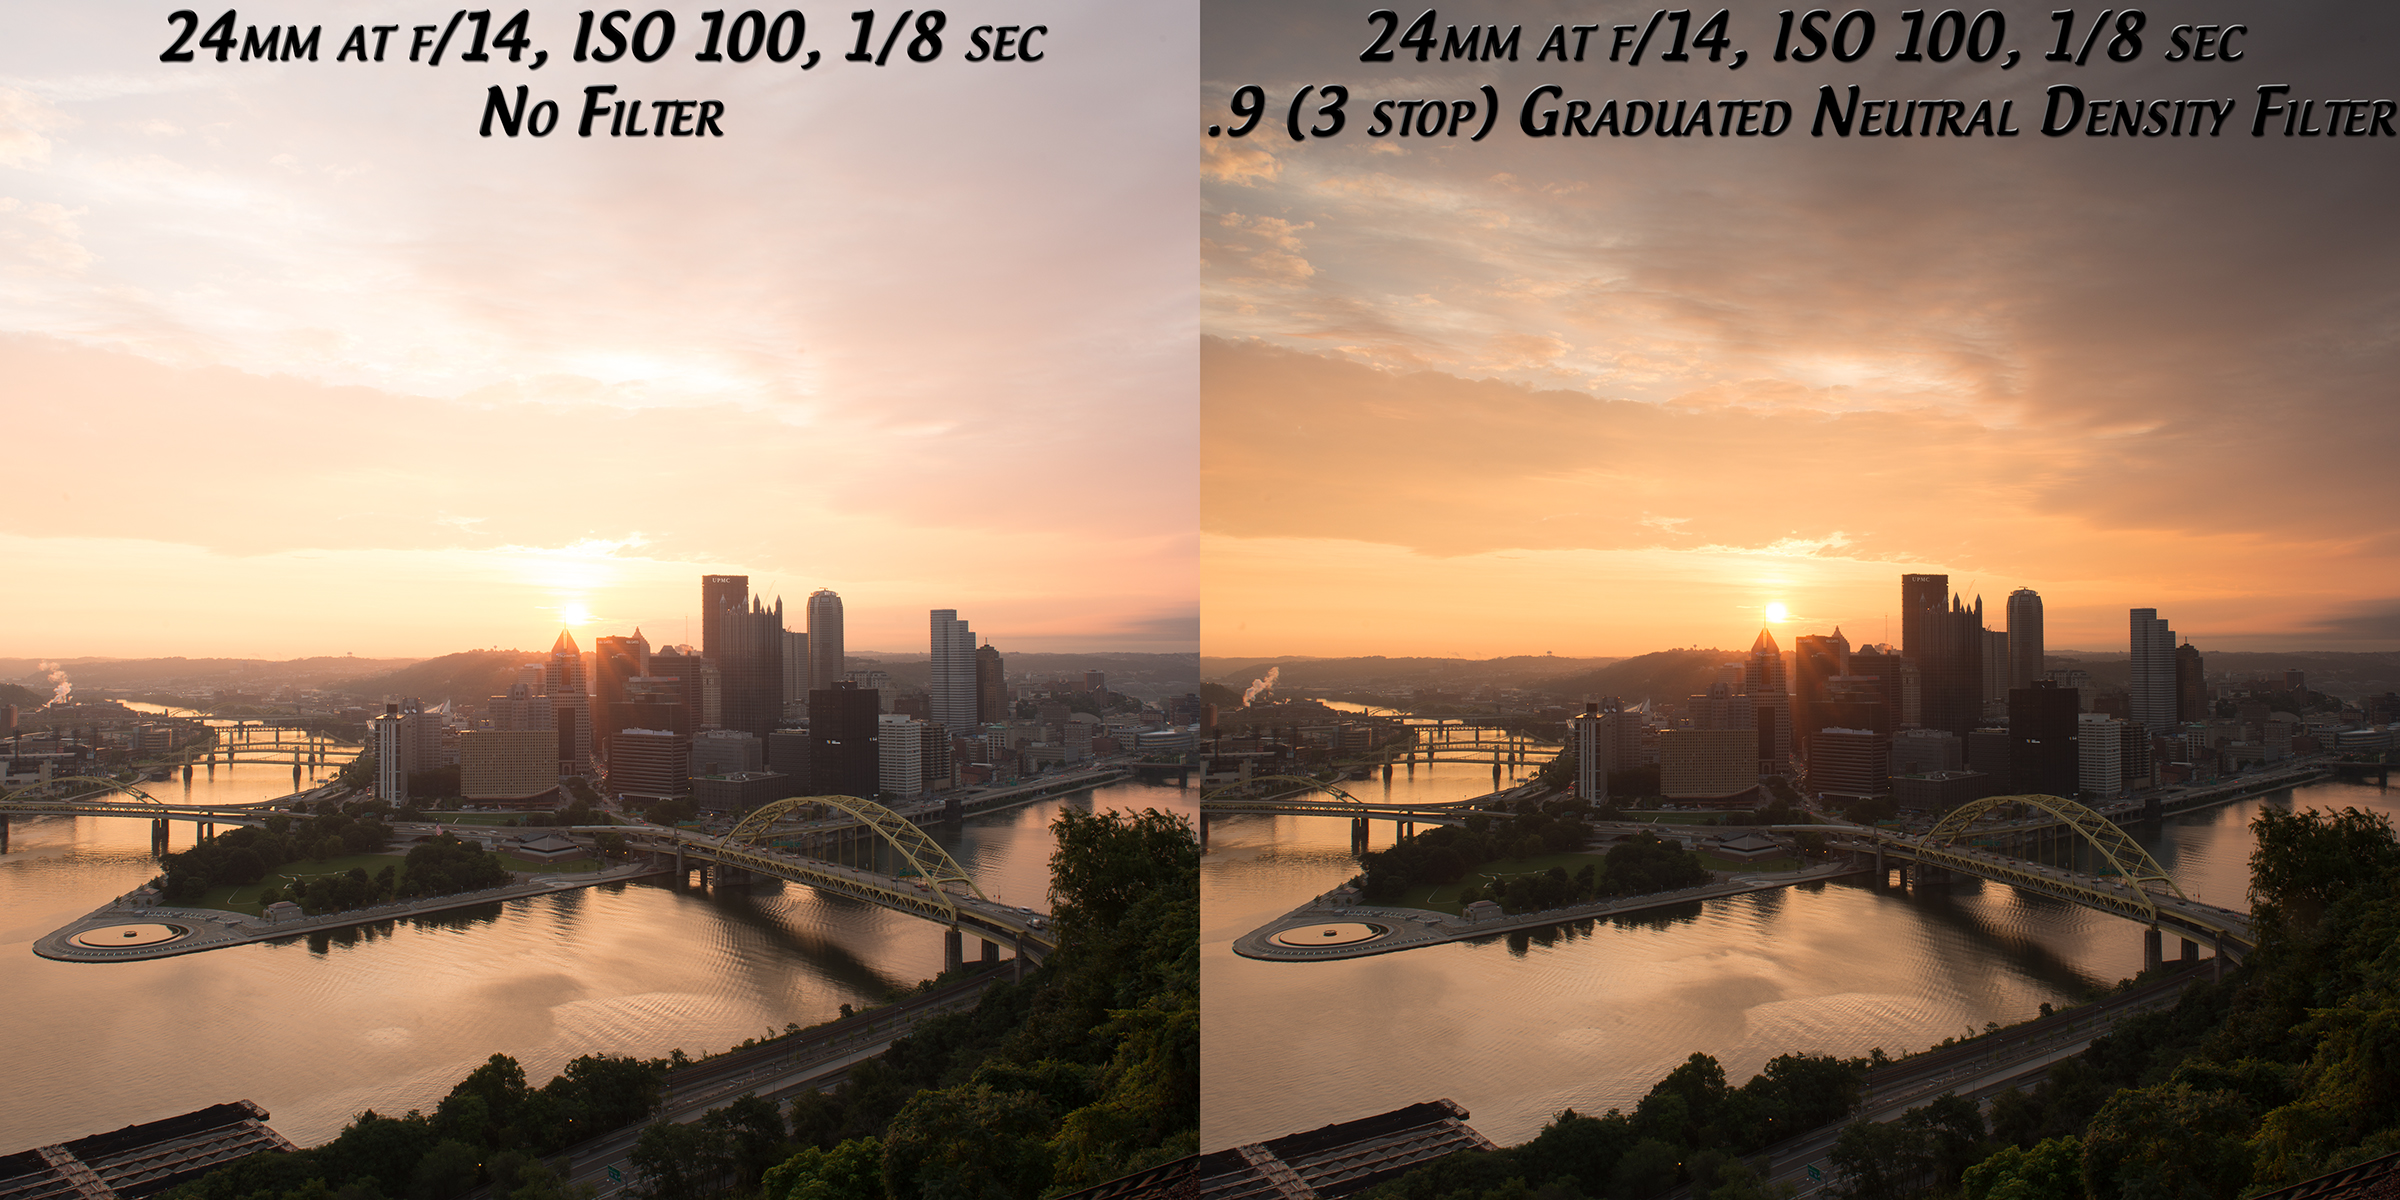
Essentially it is a rectangular, optically correct piece of resin or glass with a gradient from dark to light. It is called “neutral” because the dark part of the filter should not make any colour differences, or add a colour cast to the scene. This is not always true of cheaper filters, but the well established filter brands (Lee, Singh-Ray) leave very little colour cast on the final image. The reason behind using an ND filter is to hold light back so that the part of the scene that is brightest (usually the sky) does not overexpose. This effect creates a pleasing image. The sky is well exposed and the foreground is correctly exposed as well.
Types
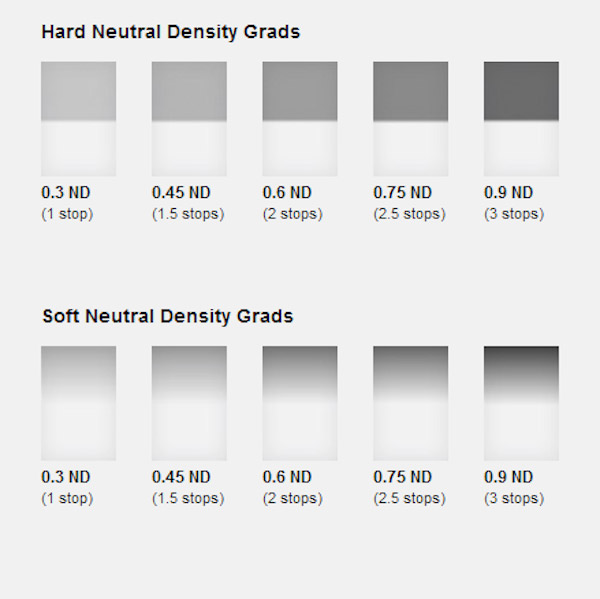
A hard edge filter is used when there is an abrupt change in brightness, such as a field with a horizon to a bright sky. A soft edge filter is a wider, smoother change from light to dark. This is used when the light and dark portions are not distinctly separated, such as a mountain and sky. A soft edge filter is less noticeable than a hard edge. It also has the benefit of making the sky more intense, darkening the sky the closer on the top.
How to use it ?
It is easier than you might think. There are some technical details to think of, but once you have used grads a few times, it is really quite simple. Here is a process that works pretty well in most lighting conditions:
- Set up your camera on a tripod and take a light meter reading of the foreground. Making sure that your camera is on Manual, point it down and fill the viewfinder with the foreground to take the reading.
- Take a light meter reading in the same way as above, of the sky.
- Work out the difference between the two exposures and use an ND Grad to get your scene to within one stop of light difference. As an example, if the sky is three stops brighter than the foreground, you can use an ND Grad that blocks two f-stops of light or a 0.6 ND Grad.
- Slide the ND grad filter into place in front of the lens and determine the best position for the gradient to be in your image. If it is a hard horizon (i.e. a seascape scene) use a hard edge grad, if it is a forest scene, use a soft edge grad.
- Expose for your foreground and make the shot.
- Check the result on your LCD screen, zoom in on the image to make sure everything is properly exposed. Make any adjustments and shoot another image if necessary.
That’s it, simple really. Of course, as I said earlier, it takes a fair amount of practice to become adept at using these filters, but the results are worth it.
If you use a filter holder you can stack filters. For example you need to overcome 6 stops of light. So you can use a 0.9 and 0.3 GND filter stacked.
But there is much more. You can let you creativity run free by adding a yellow or orange filter when shooting sunsets. Or a blue filter when you want to enhance the sky for example. So try it out and as said, a good amount of practice will learn you how to work with it.
What’s next ?
Getting yourself a GND filter and holder and step down ring. There are various brands and qualities. The brands like Lee and Nisi are really top brands and you pay up for a filter set. Brands like Cokin offer good quality and a fair price. A good way to start to learn to work with GND filters.
You need to get a stepdown ring (see the size of your lens), a filter holder and at least 2 GND filters. Photography is all about practice and getting the technique right. Yes, good equipment helps, but the most important thing is practice. Once you have mastered the technique with a cheaper filter, then consider making the investment in the more expensive ones.
Video
Watch the video below, and find out how to use graduated ND filters.
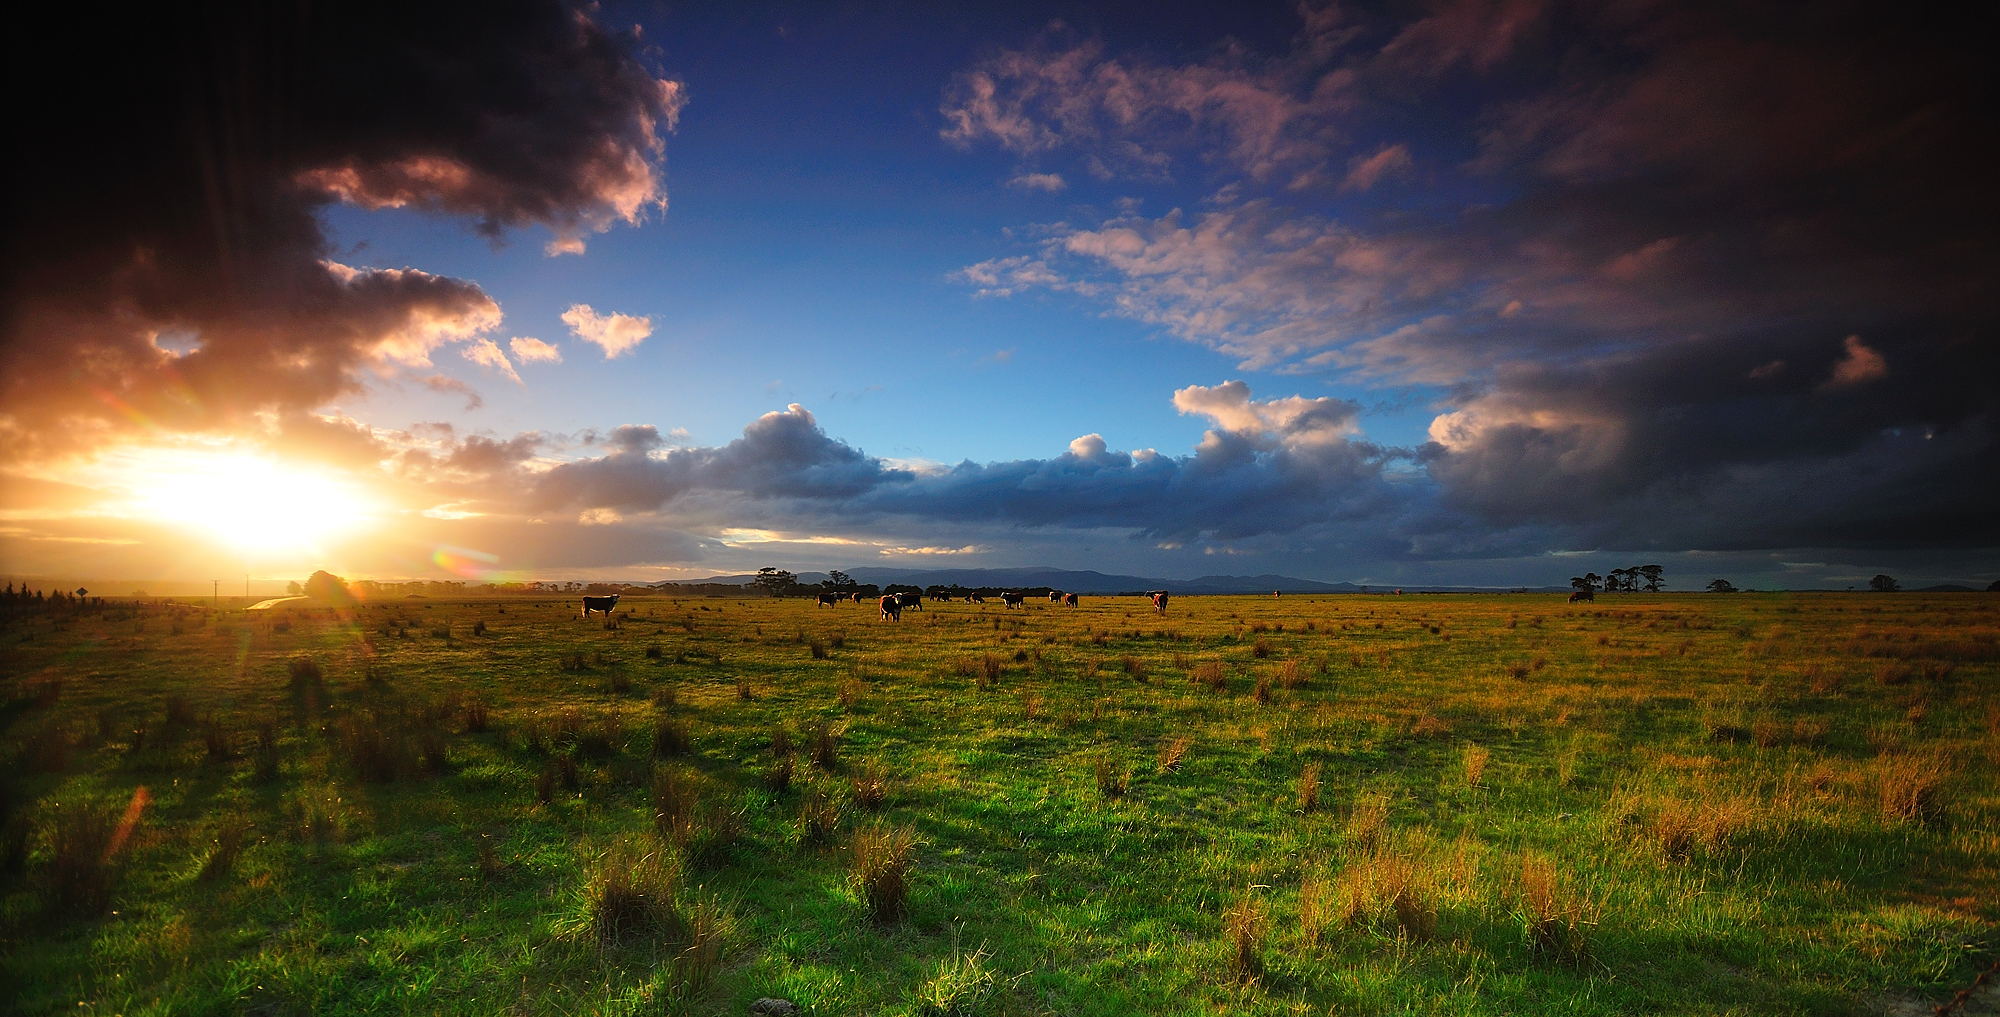
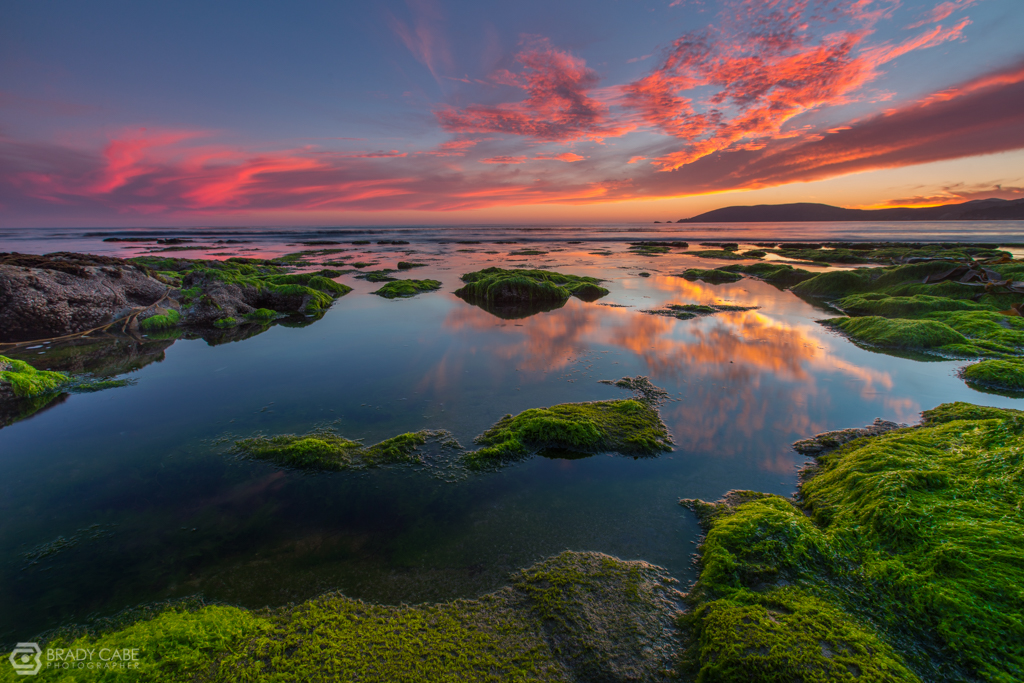
Photos shot with Graduated ND filters